When you click on links to various merchants on this site and make a purchase, this can result in this site earning a commission. Affiliate programs and affiliations include, but are not limited to, the eBay Partner Network.
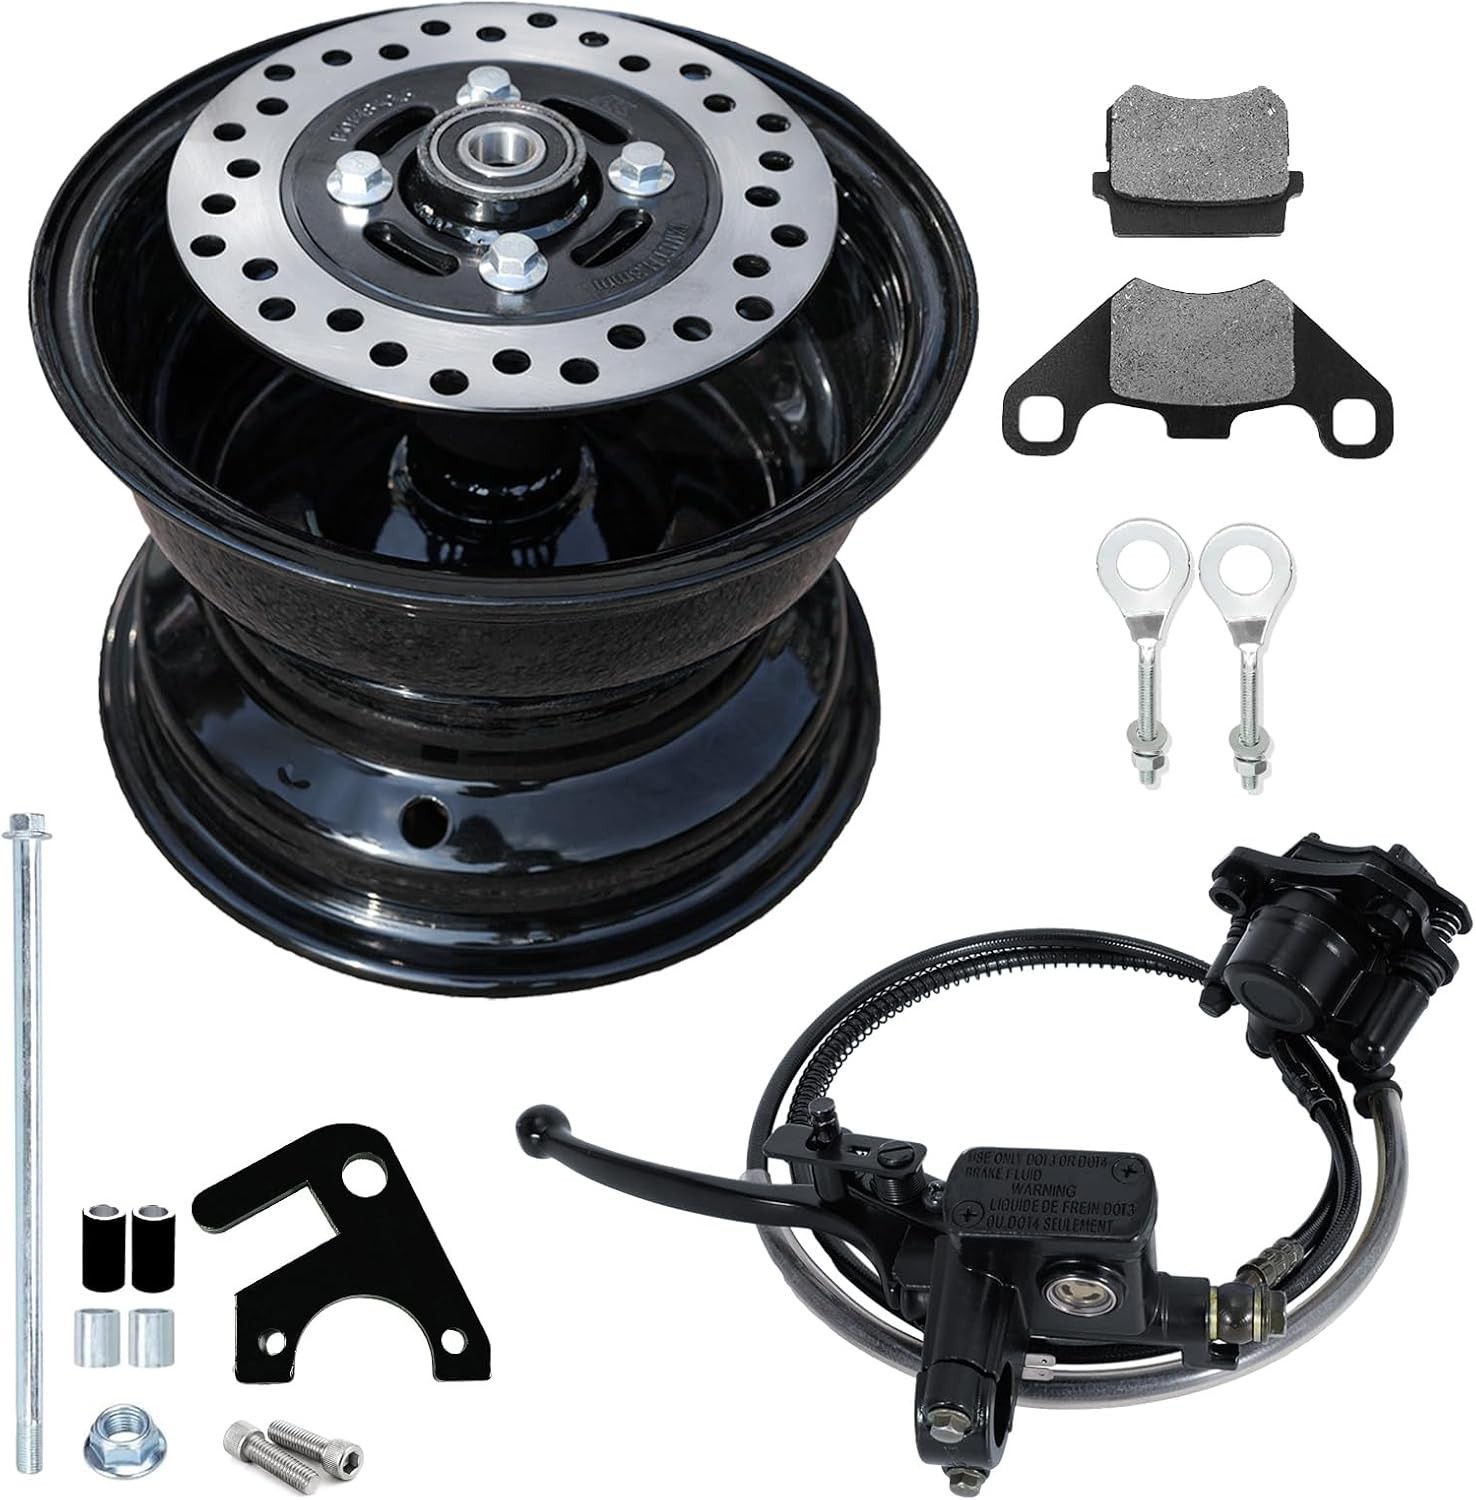
Rear Rim Disc Hydraulic Brake Kit for Mini Bikes Rear Rim Disc Hydraulic Brake Conversion Kit
Complete Upgrade Kit for Coleman, Axis & Hisun 196cc / 200cc Mini Bikes
CRITICAL INSTALLATION WARNING: Do NOT press or engage the brake handle before the entire brake system is fully installed. Pressing the handle early can dislodge the brake pads and cause fluid pressure issues, complicating the installation. Key Features & Highlights
- Complete Rear Wheel Assembly: Features a high-quality wheel hub pre-assembled with a brake disc and heavy-duty bearings for seamless setup.
- High-Performance Hydraulic Braking: Delivers superior stopping power and responsive control even under harsh off-road riding conditions. Includes an extra set of replacement brake pads.
- Bolt-On Easy Installation: No welding or major modifications required. Includes a custom mounting bracket, new axle, chain tensioners, and alignment spacers to center the wheel perfectly.
- Directional Wheel Rim Design: Engineered for optimal rolling stability and fitment.
Compatible Models
- Coleman: CT200U, BT200X, CT200U-EX, BT200X-G, BT200X-O, CT200U-EXR
- Axis: M200 (196cc)
- Hisun: 200cc Mini Bikes
Tire Size & Clearance Guidance
- 19-Inch & Smaller Tires: Fits standard stock setups cleanly without clearance issues.
- 20-Inch & Larger Tires: May cause minor chain rubbing in stock configuration. For 20"+ tires, it is recommended to install extra washers behind the sprocket to properly space the chain away from the tire.
Product Specifications Brake System Type Hydraulic Rear Disc Brake Installation Type Direct Bolt-On (No Welding) Included Components Rear Hub, Brake Disc, Caliper & Line Assembly, Axle, Spacers, Chain Tensioners, Extra Brake Pads Fitment Category Mini Bike Rear Wheel Conversion Installation Tips
- Tire Direction: Check the rolling direction arrow on your tire tread before mounting it onto the wheel hub.
- Spacer Fitment: You may need to slightly tilt the axle during fitment to slide the spacers smoothly into position inside the frame.
Please verify frame dimensions and axle setup before ordering. Professional installation is recommended. Mini bike Rear Hydraulic Brake Kit
Consistent Braking PerformanceSuperior Stopping PowerHeat DissipationJMCHstore Coleman Hisun axis Rear Disc Brake kitCompatibility
Upgrade your mini bike with our premium hydraulic rear disc brake kit, designed for enhanced stopping power. This comprehensive kit includes a rear wheel hub fitted with a brake disc and pre-installed 6202RS bearings. The hub is also designed to mount a sprocket on the other side.
- Compatible for Coleman Powersports CT200U-EX Mini bike
- Compatible for Axis M200 196cc Mini Bike
- Compatible for Coleman Powersports CT200U Mini bike
- Compatible for Coleman Powersports BT200X Mini bike
Key Features
Complete Rear Wheel Assembly
The kit includes a wheel hub with an integrated brake disc and pre-installed 6202RS bearings for smooth and hassle-free installation. The hub is designed to accommodate both a brake disc (installed) on one side and a sprocket on the other side, giving you dual functionality
Hydraulic Brake System
Ensure optimal braking performance, even in demanding off-road conditions. Comes with an additional set of brake pads for replacement.
Easy Installation
- No welding required. The kit includes a custom-designed bracket for secure attachment, a new axle, chain tensioners, and spacers to center the wheel in the frame.
- The kit is compatible with both standard mini bikes and those equipped with a rear cargo rack.
Advantages of Hydraulic Disc Brakes Over Drum BrakesSuperior Stopping Power
- Hydraulic disc brakesoffer significantly better braking force compared to drum brakes.
- This is due to the increased surface area of the disc and the efficiency of hydraulic fluid in applying pressure evenly across the brake pads, allowing for more controlled and responsive braking.
Consistent Performance
- Hydraulic disc brakesdissipate heat more effectively, reducing the risk of brake fade and ensuring consistent stopping power.
- Drum brakes, on the other hand, tend to fade as they heat up during long braking periods or steep descents, leading to reduced braking power.
Ease of Repair
- Disc brake systemsare generallyeasier to repair and replace componentssuch as pads, rotors, or calipers.
- Drum brake systemsrequire more complex servicing, especially when it comes to accessing and replacing the internal components.
More Advantages
- Better Heat Dissipation
- Lightweight
- Smoother controlled stops
installation steps
Step 1 Pre preparation
- Remove Old Components: Detach the old wheel, brake system, and any related parts from your mini bike.
- Mounting your tire onto the hub: Make sure to follow the directional tread pattern when mounting your tire onto the hub for optimal performance and handling.
- Install the sprocket
!!!Caution!!!:Do notpress the brake handle after removing the plastic piece before fully installing the brake system, as this could cause the brake pads to become dislodged, leading to complications during installation.
Step 2 Install the New Wheel Hub
- Install the mounting plate, chain tensioner, spacer, and washer in the order shown in the diagram.
- If your mini bike has a rear cargo rack, use the original axle.
- Ensure that the wheel is centered by using the included spacers.
- Tip: You may need to tilt the axle during installation to Install the spacers properly.
Step 3 Mount the Hydraulic Brake Caliper
- Secure the hydraulic brake caliper to the mounting plate using the provided M8 Bolts ( Use Black spacer), ensuring proper alignment.
- !!!Caution again!!!:Do notpress the brake handle after removing the plastic piece before fully installing the brake system, as this could cause the brake pads to become dislodged, leading to complications during installation.
Step 4 Attach the Brake Lever & Test
- Attach the brake lever to the handlebar
- Adjust and secure:Ensure that all components are tightened and aligned correctly.Check that the wheel spins freely without interference from the brake disc.
- Test the brakes:After installation, test the brakes thoroughly to ensure proper function before riding.