When you click on links to various merchants on this site and make a purchase, this can result in this site earning a commission. Affiliate programs and affiliations include, but are not limited to, the eBay Partner Network.
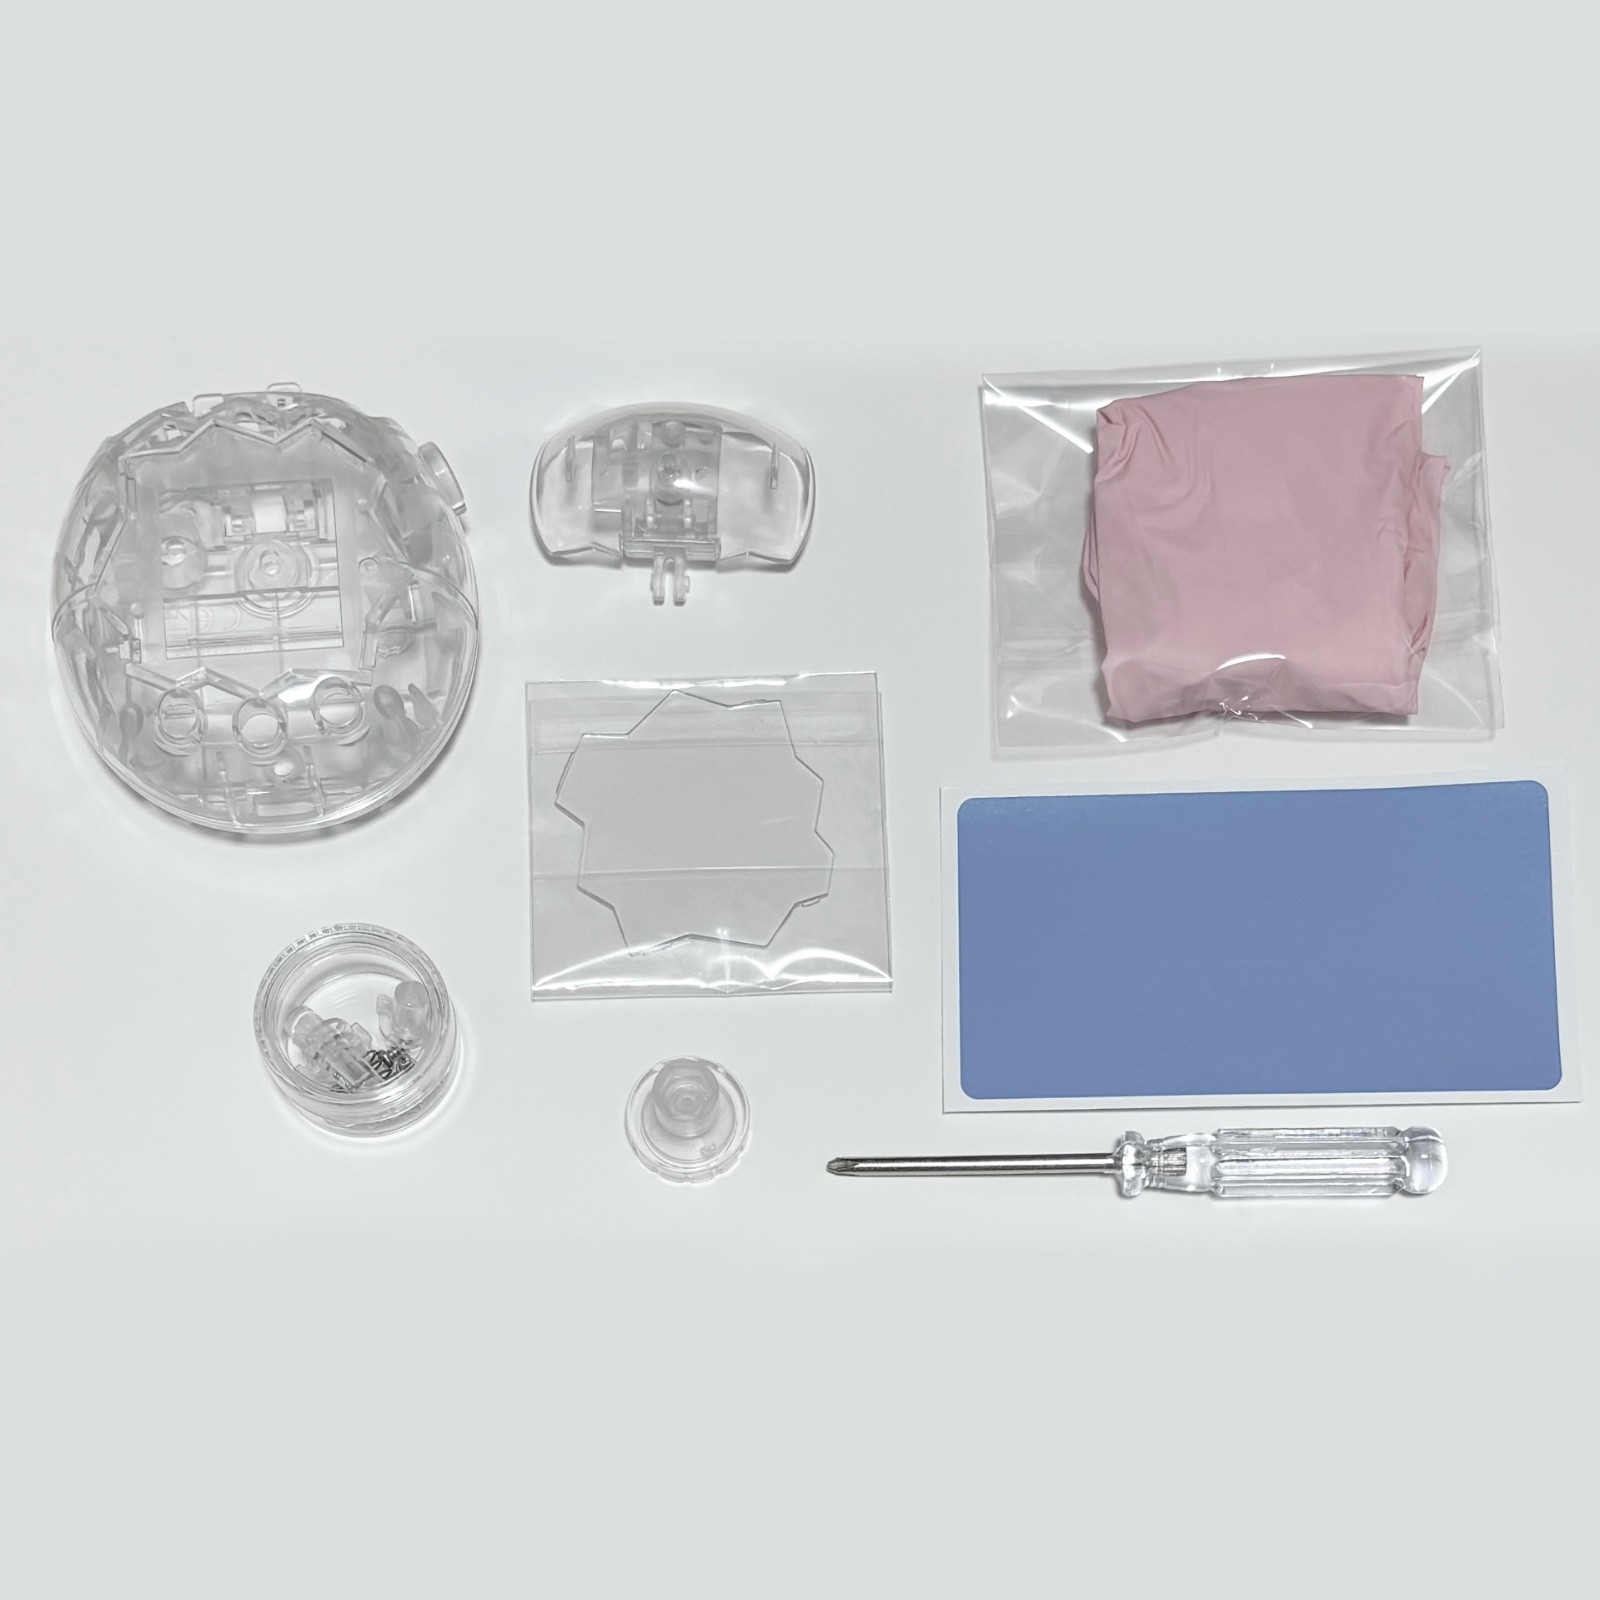
Give your Tamagotchi Paradise a new look by replacing its shell with this full DIY kit!
Set contains:
- Front shell
- Back shell
- Upper cover
- Dial
- Screws and other small parts
- Back cover
- Faceplate
- Screwdriver
- Dust remover sticker
- Gloves
- Shiny faceplate skin
Please refer to this video for instructions on changing the shell: style="white-space: pre-wrap; padding: 0px; margin: 0px; cursor: text; caret-color: rgba(0, 0, 0, 0.87); color: rgba(0, 0, 0, 0.87); font-family: sans-serif; font-size: 14px;">
Tips on replacing the shell:
- When putting the front and back shell together, make sure to push it all the way in. It should close with a click. If it is not pushed all the way, the upper cover cannot close properly.
- If you have difficulty inserting the faceplate into the front shell, shave the claws' length off by 1-2mm to make it easier to insert.
- The upper cover is much tighter than the official cover. Attach the cover to the back shell while detached from the device, and press firmly from both sides.
- If you have difficulty opening and closing the upper cover, make sure to insert your nail in the gaps when opening. The cover will become looser over time. You can also file down the part circled in the last photo with a nail file to make it easier to open and close.